TylerBlount1994 (talk | contribs) No edit summary Tag: Source edit |
TylerBlount1994 (talk | contribs) No edit summary Tag: Source edit |
||
| (One intermediate revision by the same user not shown) | |||
| Line 1: | Line 1: | ||
| − | [[File:Candle Wolf Purple Metal.jpg|right]][[File:CW Purple.png]] '''Candle Wolf Purple Metal''' is a rare Faction Metal used for upgrading the highest tiers of Weapons and Armor at [[Chokufunsha]]. |
+ | [[File:Candle Wolf Purple Metal.jpg|right]][[File:CW Purple.png]] '''Candle Wolf Purple Metal''' is a rare [[R&D_Materials#Faction_Metals|Faction Metal]] used for upgrading the highest tiers of Weapons and Armor at [[Chokufunsha]]. |
==Locations== |
==Locations== |
||
| Line 32: | Line 32: | ||
!Total |
!Total |
||
|- |
|- |
||
| − | |[[File:Icon1Weapon.png|link=Weapons| |
+ | |[[File:Icon1Weapon.png|link=Weapons|center|14px]] |
|[[Candle Wolf|CW]] |
|[[Candle Wolf|CW]] |
||
|[[Axe of Destruction S]] |
|[[Axe of Destruction S]] |
||
| Line 39: | Line 39: | ||
|30 |
|30 |
||
|- |
|- |
||
| − | |[[File:Icon1Weapon.png|link=Weapons| |
+ | |[[File:Icon1Weapon.png|link=Weapons|center|14px]] |
|[[Candle Wolf|CW]] |
|[[Candle Wolf|CW]] |
||
|[[Spirit Lance S]] |
|[[Spirit Lance S]] |
||
| Line 46: | Line 46: | ||
|11 |
|11 |
||
|- |
|- |
||
| − | |[[File:Icon1Weapon.png|link=Weapons| |
+ | |[[File:Icon1Weapon.png|link=Weapons|center|14px]] |
|[[Candle Wolf|CW]] |
|[[Candle Wolf|CW]] |
||
|[[Spirit Lance S]] |
|[[Spirit Lance S]] |
||
| Line 53: | Line 53: | ||
|30 |
|30 |
||
|- |
|- |
||
| − | |[[File:Icon1Weapon.png|link=Weapons| |
+ | |[[File:Icon1Weapon.png|link=Weapons|center|14px]] |
|[[Candle Wolf|CW]] |
|[[Candle Wolf|CW]] |
||
|[[Muramasa Blade S]] |
|[[Muramasa Blade S]] |
||
| Line 60: | Line 60: | ||
|10 |
|10 |
||
|- |
|- |
||
| − | |[[File:Icon1Weapon.png|link=Weapons| |
+ | |[[File:Icon1Weapon.png|link=Weapons|center|14px]] |
|[[Candle Wolf|CW]] |
|[[Candle Wolf|CW]] |
||
|[[Muramasa Blade S]] |
|[[Muramasa Blade S]] |
||
| Line 67: | Line 67: | ||
|30 |
|30 |
||
|- |
|- |
||
| − | |[[File:Icon1Weapon.png|link=Weapons| |
+ | |[[File:Icon1Weapon.png|link=Weapons|center|14px]] |
|[[Candle Wolf|CW]] |
|[[Candle Wolf|CW]] |
||
|[[Nightmare Claw S]] |
|[[Nightmare Claw S]] |
||
| Line 74: | Line 74: | ||
|6 |
|6 |
||
|- |
|- |
||
| − | |[[File:Icon1Weapon.png|link=Weapons| |
+ | |[[File:Icon1Weapon.png|link=Weapons|center|14px]] |
|[[Candle Wolf|CW]] |
|[[Candle Wolf|CW]] |
||
|[[Nightmare Claw S]] |
|[[Nightmare Claw S]] |
||
| Line 81: | Line 81: | ||
|30 |
|30 |
||
|- |
|- |
||
| − | |[[File:Icon1Weapon.png|link=Weapons| |
+ | |[[File:Icon1Weapon.png|link=Weapons|center|14px]] |
|[[Candle Wolf|CW]] |
|[[Candle Wolf|CW]] |
||
|[[Armor Breaking Flail S]] |
|[[Armor Breaking Flail S]] |
||
| Line 88: | Line 88: | ||
|5 |
|5 |
||
|- |
|- |
||
| − | |[[File:Icon1Weapon.png|link=Weapons| |
+ | |[[File:Icon1Weapon.png|link=Weapons|center|14px]] |
|[[Candle Wolf|CW]] |
|[[Candle Wolf|CW]] |
||
|[[Wand of Conflagration S]] |
|[[Wand of Conflagration S]] |
||
| Line 95: | Line 95: | ||
|6 |
|6 |
||
|- |
|- |
||
| − | |[[File:Icon1Weapon.png|link=Weapons| |
+ | |[[File:Icon1Weapon.png|link=Weapons|center|14px]] |
|[[Candle Wolf|CW]] |
|[[Candle Wolf|CW]] |
||
|[[Wand of Conflagration S]] |
|[[Wand of Conflagration S]] |
||
| Line 102: | Line 102: | ||
|30 |
|30 |
||
|- |
|- |
||
| − | |[[File:Icon1Weapon.png|link=Weapons| |
+ | |[[File:Icon1Weapon.png|link=Weapons|center|14px]] |
|[[Candle Wolf|CW]] |
|[[Candle Wolf|CW]] |
||
|[[Tornado Shuriken S]] |
|[[Tornado Shuriken S]] |
||
| Line 109: | Line 109: | ||
|18 |
|18 |
||
|- |
|- |
||
| − | |[[File:Icon1Weapon.png|link=Weapons| |
+ | |[[File:Icon1Weapon.png|link=Weapons|center|14px]] |
|[[Candle Wolf|CW]] |
|[[Candle Wolf|CW]] |
||
|[[Tornado Shuriken S]] |
|[[Tornado Shuriken S]] |
||
| Line 116: | Line 116: | ||
|30 |
|30 |
||
|- |
|- |
||
| − | |[[File:Icon1Weapon.png|link=Weapons| |
+ | |[[File:Icon1Weapon.png|link=Weapons|center|14px]] |
|[[Candle Wolf|CW]] |
|[[Candle Wolf|CW]] |
||
|[[Classic Lion Knuckles S]] |
|[[Classic Lion Knuckles S]] |
||
| Line 123: | Line 123: | ||
|11 |
|11 |
||
|- |
|- |
||
| − | |[[File:Icon1Weapon.png|link=Weapons| |
+ | |[[File:Icon1Weapon.png|link=Weapons|center|14px]] |
|[[Candle Wolf|CW]] |
|[[Candle Wolf|CW]] |
||
|[[Classic Lion Knuckles S]] |
|[[Classic Lion Knuckles S]] |
||
| Line 130: | Line 130: | ||
|30 |
|30 |
||
|- |
|- |
||
| − | |[[File:Icon1Weapon.png|link=Weapons| |
+ | |[[File:Icon1Weapon.png|link=Weapons|center|14px]] |
|[[Candle Wolf|CW]] |
|[[Candle Wolf|CW]] |
||
|[[Head of Medusa]] |
|[[Head of Medusa]] |
||
| Line 137: | Line 137: | ||
|3 |
|3 |
||
|- |
|- |
||
| − | |[[File:Icon1Weapon.png|link=Weapons| |
+ | |[[File:Icon1Weapon.png|link=Weapons|center|14px]] |
|[[Candle Wolf|CW]] |
|[[Candle Wolf|CW]] |
||
|[[Vajra of Light]] |
|[[Vajra of Light]] |
||
| Line 144: | Line 144: | ||
|3 |
|3 |
||
|- |
|- |
||
| − | |[[File:Icon1Weapon.png|link=Weapons| |
+ | |[[File:Icon1Weapon.png|link=Weapons|center|14px]] |
|[[Candle Wolf|CW]] |
|[[Candle Wolf|CW]] |
||
|[[Ouroboros]] |
|[[Ouroboros]] |
||
| Line 151: | Line 151: | ||
|100 |
|100 |
||
|- |
|- |
||
| − | |[[File:Icon2Head.png|link=Head Armor| |
+ | |[[File:Icon2Head.png|link=Head Armor|center|16px]] |
|[[Candle Wolf|CW]] |
|[[Candle Wolf|CW]] |
||
|[[Hades Knight Helmet S]] |
|[[Hades Knight Helmet S]] |
||
| Line 158: | Line 158: | ||
|3 |
|3 |
||
|- |
|- |
||
| − | |[[File:Icon2Head.png|link=Head Armor| |
+ | |[[File:Icon2Head.png|link=Head Armor|center|16px]] |
|[[Candle Wolf|CW]] |
|[[Candle Wolf|CW]] |
||
|[[Bishop's Cowl S]] |
|[[Bishop's Cowl S]] |
||
| Line 165: | Line 165: | ||
|6 |
|6 |
||
|- |
|- |
||
| − | |[[File:Icon2Head.png|link=Head Armor| |
+ | |[[File:Icon2Head.png|link=Head Armor|center|16px]] |
|[[Candle Wolf|CW]] |
|[[Candle Wolf|CW]] |
||
|[[Berserker Helmet S]] |
|[[Berserker Helmet S]] |
||
| Line 172: | Line 172: | ||
|5 |
|5 |
||
|- |
|- |
||
| − | |[[File:Icon2Head.png|link=Head Armor| |
+ | |[[File:Icon2Head.png|link=Head Armor|center|16px]] |
|[[Candle Wolf|CW]] |
|[[Candle Wolf|CW]] |
||
|[[Lion Sword Dancer Head S]] |
|[[Lion Sword Dancer Head S]] |
||
| Line 179: | Line 179: | ||
|10 |
|10 |
||
|- |
|- |
||
| − | |[[File:Icon2Head.png|link=Head Armor| |
+ | |[[File:Icon2Head.png|link=Head Armor|center|16px]] |
|[[Candle Wolf|CW]] |
|[[Candle Wolf|CW]] |
||
|[[Black Thunder Helmet]] |
|[[Black Thunder Helmet]] |
||
| Line 186: | Line 186: | ||
|3 |
|3 |
||
|- |
|- |
||
| − | |[[File:Icon3Body.png|link=Body Armor| |
+ | |[[File:Icon3Body.png|link=Body Armor|center|18px]] |
|[[Candle Wolf|CW]] |
|[[Candle Wolf|CW]] |
||
|[[Hades Knight Armor S]] |
|[[Hades Knight Armor S]] |
||
| Line 193: | Line 193: | ||
|6 |
|6 |
||
|- |
|- |
||
| − | |[[File:Icon3Body.png|link=Body Armor| |
+ | |[[File:Icon3Body.png|link=Body Armor|center|18px]] |
|[[Candle Wolf|CW]] |
|[[Candle Wolf|CW]] |
||
|[[Hades Knight Armor S]] |
|[[Hades Knight Armor S]] |
||
| Line 200: | Line 200: | ||
|15 |
|15 |
||
|- |
|- |
||
| − | |[[File:Icon3Body.png|link=Body Armor| |
+ | |[[File:Icon3Body.png|link=Body Armor|center|18px]] |
|[[Candle Wolf|CW]] |
|[[Candle Wolf|CW]] |
||
|[[Avatar of Zard Mail S]] |
|[[Avatar of Zard Mail S]] |
||
| Line 207: | Line 207: | ||
|15 |
|15 |
||
|- |
|- |
||
| − | |[[File:Icon3Body.png|link=Body Armor| |
+ | |[[File:Icon3Body.png|link=Body Armor|center|18px]] |
|[[Candle Wolf|CW]] |
|[[Candle Wolf|CW]] |
||
|[[Swordmaster Armor S]] |
|[[Swordmaster Armor S]] |
||
| Line 214: | Line 214: | ||
|15 |
|15 |
||
|- |
|- |
||
| − | |[[File:Icon3Body.png|link=Body Armor| |
+ | |[[File:Icon3Body.png|link=Body Armor|center|18px]] |
|[[Candle Wolf|CW]] |
|[[Candle Wolf|CW]] |
||
|[[Arahabaki Armor S]] |
|[[Arahabaki Armor S]] |
||
| Line 221: | Line 221: | ||
|6 |
|6 |
||
|- |
|- |
||
| − | |[[File:Icon3Body.png|link=Body Armor| |
+ | |[[File:Icon3Body.png|link=Body Armor|center|18px]] |
|[[Candle Wolf|CW]] |
|[[Candle Wolf|CW]] |
||
|[[Arahabaki Armor S]] |
|[[Arahabaki Armor S]] |
||
| Line 228: | Line 228: | ||
|15 |
|15 |
||
|- |
|- |
||
| − | |[[File:Icon3Body.png|link=Body Armor| |
+ | |[[File:Icon3Body.png|link=Body Armor|center|18px]] |
|[[Candle Wolf|CW]] |
|[[Candle Wolf|CW]] |
||
|[[Arahabaki Armor S RE]] |
|[[Arahabaki Armor S RE]] |
||
| Line 235: | Line 235: | ||
|6 |
|6 |
||
|- |
|- |
||
| − | |[[File:Icon3Body.png|link=Body Armor| |
+ | |[[File:Icon3Body.png|link=Body Armor|center|18px]] |
|[[Candle Wolf|CW]] |
|[[Candle Wolf|CW]] |
||
|[[Arahabaki Armor S RE]] |
|[[Arahabaki Armor S RE]] |
||
| Line 242: | Line 242: | ||
|15 |
|15 |
||
|- |
|- |
||
| − | |[[File:Icon3Body.png|link=Body Armor| |
+ | |[[File:Icon3Body.png|link=Body Armor|center|18px]] |
|[[Candle Wolf|CW]] |
|[[Candle Wolf|CW]] |
||
|[[Dark Rogue Armor S]] |
|[[Dark Rogue Armor S]] |
||
| Line 249: | Line 249: | ||
|6 |
|6 |
||
|- |
|- |
||
| − | |[[File:Icon3Body.png|link=Body Armor| |
+ | |[[File:Icon3Body.png|link=Body Armor|center|18px]] |
|[[Candle Wolf|CW]] |
|[[Candle Wolf|CW]] |
||
|[[Dark Rogue Armor S]] |
|[[Dark Rogue Armor S]] |
||
| Line 256: | Line 256: | ||
|15 |
|15 |
||
|- |
|- |
||
| − | |[[File:Icon3Body.png|link=Body Armor| |
+ | |[[File:Icon3Body.png|link=Body Armor|center|18px]] |
|[[Candle Wolf|CW]] |
|[[Candle Wolf|CW]] |
||
|[[Shogun Armor S]] |
|[[Shogun Armor S]] |
||
| Line 263: | Line 263: | ||
|6 |
|6 |
||
|- |
|- |
||
| − | |[[File:Icon3Body.png|link=Body Armor| |
+ | |[[File:Icon3Body.png|link=Body Armor|center|18px]] |
|[[Candle Wolf|CW]] |
|[[Candle Wolf|CW]] |
||
|[[Shogun Armor S]] |
|[[Shogun Armor S]] |
||
| Line 270: | Line 270: | ||
|15 |
|15 |
||
|- |
|- |
||
| − | |[[File:Icon3Body.png|link=Body Armor| |
+ | |[[File:Icon3Body.png|link=Body Armor|center|18px]] |
|[[Candle Wolf|CW]] |
|[[Candle Wolf|CW]] |
||
|[[Shogun Armor S BT]] |
|[[Shogun Armor S BT]] |
||
| Line 277: | Line 277: | ||
|6 |
|6 |
||
|- |
|- |
||
| − | |[[File:Icon3Body.png|link=Body Armor| |
+ | |[[File:Icon3Body.png|link=Body Armor|center|18px]] |
|[[Candle Wolf|CW]] |
|[[Candle Wolf|CW]] |
||
|[[Shogun Armor S BT]] |
|[[Shogun Armor S BT]] |
||
| Line 284: | Line 284: | ||
|15 |
|15 |
||
|- |
|- |
||
| − | |[[File:Icon3Body.png|link=Body Armor| |
+ | |[[File:Icon3Body.png|link=Body Armor|center|18px]] |
|[[Candle Wolf|CW]] |
|[[Candle Wolf|CW]] |
||
|[[Manic Wizard Coat S]] |
|[[Manic Wizard Coat S]] |
||
| Line 291: | Line 291: | ||
|10 |
|10 |
||
|- |
|- |
||
| − | |[[File:Icon3Body.png|link=Body Armor| |
+ | |[[File:Icon3Body.png|link=Body Armor|center|18px]] |
|[[Candle Wolf|CW]] |
|[[Candle Wolf|CW]] |
||
|[[Manic Wizard Coat S]] |
|[[Manic Wizard Coat S]] |
||
| Line 298: | Line 298: | ||
|15 |
|15 |
||
|- |
|- |
||
| − | |[[File:Icon3Body.png|link=Body Armor| |
+ | |[[File:Icon3Body.png|link=Body Armor|center|18px]] |
|[[Candle Wolf|CW]] |
|[[Candle Wolf|CW]] |
||
|[[Last Paladin's Armor S]] |
|[[Last Paladin's Armor S]] |
||
| Line 305: | Line 305: | ||
|6 |
|6 |
||
|- |
|- |
||
| − | |[[File:Icon3Body.png|link=Body Armor| |
+ | |[[File:Icon3Body.png|link=Body Armor|center|18px]] |
|[[Candle Wolf|CW]] |
|[[Candle Wolf|CW]] |
||
|[[Last Paladin's Armor S]] |
|[[Last Paladin's Armor S]] |
||
| Line 312: | Line 312: | ||
|15 |
|15 |
||
|- |
|- |
||
| − | |[[File:Icon3Body.png|link=Body Armor| |
+ | |[[File:Icon3Body.png|link=Body Armor|center|18px]] |
|[[Candle Wolf|CW]] |
|[[Candle Wolf|CW]] |
||
|[[Last Paladin's Armor S EW]] |
|[[Last Paladin's Armor S EW]] |
||
| Line 319: | Line 319: | ||
|6 |
|6 |
||
|- |
|- |
||
| − | |[[File:Icon3Body.png|link=Body Armor| |
+ | |[[File:Icon3Body.png|link=Body Armor|center|18px]] |
|[[Candle Wolf|CW]] |
|[[Candle Wolf|CW]] |
||
|[[Last Paladin's Armor S EW]] |
|[[Last Paladin's Armor S EW]] |
||
| Line 326: | Line 326: | ||
|15 |
|15 |
||
|- |
|- |
||
| − | |[[File:Icon3Body.png|link=Body Armor| |
+ | |[[File:Icon3Body.png|link=Body Armor|center|18px]] |
|[[Candle Wolf|CW]] |
|[[Candle Wolf|CW]] |
||
|[[Bishop's Coat S]] |
|[[Bishop's Coat S]] |
||
| Line 333: | Line 333: | ||
|8 |
|8 |
||
|- |
|- |
||
| − | |[[File:Icon3Body.png|link=Body Armor| |
+ | |[[File:Icon3Body.png|link=Body Armor|center|18px]] |
|[[Candle Wolf|CW]] |
|[[Candle Wolf|CW]] |
||
|[[Bishop's Coat S]] |
|[[Bishop's Coat S]] |
||
| Line 340: | Line 340: | ||
|15 |
|15 |
||
|- |
|- |
||
| − | |[[File:Icon3Body.png|link=Body Armor| |
+ | |[[File:Icon3Body.png|link=Body Armor|center|18px]] |
|[[Candle Wolf|CW]] |
|[[Candle Wolf|CW]] |
||
|[[Berserker Armor S]] |
|[[Berserker Armor S]] |
||
| Line 347: | Line 347: | ||
|6 |
|6 |
||
|- |
|- |
||
| − | |[[File:Icon3Body.png|link=Body Armor| |
+ | |[[File:Icon3Body.png|link=Body Armor|center|18px]] |
|[[Candle Wolf|CW]] |
|[[Candle Wolf|CW]] |
||
|[[Berserker Armor S]] |
|[[Berserker Armor S]] |
||
| Line 354: | Line 354: | ||
|15 |
|15 |
||
|- |
|- |
||
| − | |[[File:Icon3Body.png|link=Body Armor| |
+ | |[[File:Icon3Body.png|link=Body Armor|center|18px]] |
|[[Candle Wolf|CW]] |
|[[Candle Wolf|CW]] |
||
|[[Lion Sword Dancer Armor S]] |
|[[Lion Sword Dancer Armor S]] |
||
| Line 361: | Line 361: | ||
|8 |
|8 |
||
|- |
|- |
||
| − | |[[File:Icon3Body.png|link=Body Armor| |
+ | |[[File:Icon3Body.png|link=Body Armor|center|18px]] |
|[[Candle Wolf|CW]] |
|[[Candle Wolf|CW]] |
||
|[[Lion Sword Dancer Armor S]] |
|[[Lion Sword Dancer Armor S]] |
||
| Line 368: | Line 368: | ||
|15 |
|15 |
||
|- |
|- |
||
| − | |[[File:Icon3Body.png|link=Body Armor| |
+ | |[[File:Icon3Body.png|link=Body Armor|center|18px]] |
|[[Candle Wolf|CW]] |
|[[Candle Wolf|CW]] |
||
|[[Black Thunder Armor]] |
|[[Black Thunder Armor]] |
||
| Line 375: | Line 375: | ||
|3 |
|3 |
||
|- |
|- |
||
| − | |[[File:Icon4Legs.png|link=Leg Armor| |
+ | |[[File:Icon4Legs.png|link=Leg Armor|center|11px]] |
|[[Candle Wolf|CW]] |
|[[Candle Wolf|CW]] |
||
|[[Hades Knight Leggings S]] |
|[[Hades Knight Leggings S]] |
||
| Line 382: | Line 382: | ||
|8 |
|8 |
||
|- |
|- |
||
| − | |[[File:Icon4Legs.png|link=Leg Armor| |
+ | |[[File:Icon4Legs.png|link=Leg Armor|center|11px]] |
|[[Candle Wolf|CW]] |
|[[Candle Wolf|CW]] |
||
|[[Arahabaki Leggings S]] |
|[[Arahabaki Leggings S]] |
||
| Line 389: | Line 389: | ||
|3 |
|3 |
||
|- |
|- |
||
| − | |[[File:Icon4Legs.png|link=Leg Armor| |
+ | |[[File:Icon4Legs.png|link=Leg Armor|center|11px]] |
|[[Candle Wolf|CW]] |
|[[Candle Wolf|CW]] |
||
|[[Arahabaki Leggings S RE]] |
|[[Arahabaki Leggings S RE]] |
||
| Line 396: | Line 396: | ||
|2 |
|2 |
||
|- |
|- |
||
| − | |[[File:Icon4Legs.png|link=Leg Armor| |
+ | |[[File:Icon4Legs.png|link=Leg Armor|center|11px]] |
|[[Candle Wolf|CW]] |
|[[Candle Wolf|CW]] |
||
|[[Manic Wizard Leggings S]] |
|[[Manic Wizard Leggings S]] |
||
| Line 403: | Line 403: | ||
|7 |
|7 |
||
|- |
|- |
||
| − | |[[File:Icon4Legs.png|link=Leg Armor| |
+ | |[[File:Icon4Legs.png|link=Leg Armor|center|11px]] |
|[[Candle Wolf|CW]] |
|[[Candle Wolf|CW]] |
||
|[[Last Paladin's Leggings S]] |
|[[Last Paladin's Leggings S]] |
||
| Line 410: | Line 410: | ||
|3 |
|3 |
||
|- |
|- |
||
| − | |[[File:Icon4Legs.png|link=Leg Armor| |
+ | |[[File:Icon4Legs.png|link=Leg Armor|center|11px]] |
|[[Candle Wolf|CW]] |
|[[Candle Wolf|CW]] |
||
|[[Bishop's Leggings S]] |
|[[Bishop's Leggings S]] |
||
| Line 417: | Line 417: | ||
|3 |
|3 |
||
|- |
|- |
||
| − | |[[File:Icon4Legs.png|link=Leg Armor| |
+ | |[[File:Icon4Legs.png|link=Leg Armor|center|11px]] |
|[[Candle Wolf|CW]] |
|[[Candle Wolf|CW]] |
||
|[[Berserker Leggings S]] |
|[[Berserker Leggings S]] |
||
| Line 424: | Line 424: | ||
|6 |
|6 |
||
|- |
|- |
||
| − | |[[File:Icon4Legs.png|link=Leg Armor| |
+ | |[[File:Icon4Legs.png|link=Leg Armor|center|11px]] |
|[[Candle Wolf|CW]] |
|[[Candle Wolf|CW]] |
||
|[[Sword Dancer Leggings|Lion Sword Dancer Leggings S]] |
|[[Sword Dancer Leggings|Lion Sword Dancer Leggings S]] |
||
| Line 431: | Line 431: | ||
|9 |
|9 |
||
|- |
|- |
||
| − | |[[File:Icon4Legs.png|link=Leg Armor| |
+ | |[[File:Icon4Legs.png|link=Leg Armor|center|11px]] |
|[[Candle Wolf|CW]] |
|[[Candle Wolf|CW]] |
||
|[[Black Thunder Leggings]] |
|[[Black Thunder Leggings]] |
||
| Line 448: | Line 448: | ||
!Total |
!Total |
||
|- |
|- |
||
| − | |[[File:Icon1Weapon.png|link=Weapons| |
+ | |[[File:Icon1Weapon.png|link=Weapons|center|14px]] |
|[[Candle Wolf|CW]] |
|[[Candle Wolf|CW]] |
||
|[[TDM Katana|''Muramasa Blade S TDM'']] |
|[[TDM Katana|''Muramasa Blade S TDM'']] |
||
| Line 455: | Line 455: | ||
|5 |
|5 |
||
|- |
|- |
||
| − | |[[File:Icon1Weapon.png|link=Weapons| |
+ | |[[File:Icon1Weapon.png|link=Weapons|center|14px]] |
|[[Candle Wolf|CW]] |
|[[Candle Wolf|CW]] |
||
|[[TDM Katana|''Muramasa Blade S TDM'']] |
|[[TDM Katana|''Muramasa Blade S TDM'']] |
||
| − | | |
+ | |UC |
|<font color="gold">★★★★★★</font> |
|<font color="gold">★★★★★★</font> |
||
|30 |
|30 |
||
|- |
|- |
||
| − | |[[File:Icon1Weapon.png|link=Weapons| |
+ | |[[File:Icon1Weapon.png|link=Weapons|center|14px]] |
|[[Candle Wolf|CW]] |
|[[Candle Wolf|CW]] |
||
|[[TDM Thunder Rod|''Thor's Wand S TDM'']] |
|[[TDM Thunder Rod|''Thor's Wand S TDM'']] |
||
| Line 469: | Line 469: | ||
|5 |
|5 |
||
|- |
|- |
||
| − | |[[File:Icon2Head.png|link=Head Armor| |
+ | |[[File:Icon2Head.png|link=Head Armor|center|16px]] |
|[[Candle Wolf|CW]] |
|[[Candle Wolf|CW]] |
||
|[[Knight's Helm ZX|''Knight's Helm A ZX'']] |
|[[Knight's Helm ZX|''Knight's Helm A ZX'']] |
||
| Line 476: | Line 476: | ||
|3 |
|3 |
||
|- |
|- |
||
| − | |[[File:Icon3Body.png|link=Body Armor| |
+ | |[[File:Icon3Body.png|link=Body Armor|center|18px]] |
|[[Candle Wolf|CW]] |
|[[Candle Wolf|CW]] |
||
|[[Knight's Armor ZX|''Knight's Armor A ZX'']] |
|[[Knight's Armor ZX|''Knight's Armor A ZX'']] |
||
| Line 483: | Line 483: | ||
|6 |
|6 |
||
|- |
|- |
||
| − | |[[File:Icon3Body.png|link=Body Armor| |
+ | |[[File:Icon3Body.png|link=Body Armor|center|18px]] |
|[[Candle Wolf|CW]] |
|[[Candle Wolf|CW]] |
||
|[[Knight's Armor ZX|''Knight's Armor A ZX'']] |
|[[Knight's Armor ZX|''Knight's Armor A ZX'']] |
||
| Line 490: | Line 490: | ||
|15 |
|15 |
||
|- |
|- |
||
| − | |[[File:Icon3Body.png|link=Body Armor| |
+ | |[[File:Icon3Body.png|link=Body Armor|center|18px]] |
|[[Candle Wolf|CW]] |
|[[Candle Wolf|CW]] |
||
|[[Kat Body|''Kat Body 4'']] |
|[[Kat Body|''Kat Body 4'']] |
||
| Line 497: | Line 497: | ||
|15 |
|15 |
||
|- |
|- |
||
| − | |[[File:Icon4Legs.png|link=Leg Armor| |
+ | |[[File:Icon4Legs.png|link=Leg Armor|center|11px]] |
|[[Candle Wolf|CW]] |
|[[Candle Wolf|CW]] |
||
|[[Knight's Leggings ZX|''Knight's Leggings A ZX'']] |
|[[Knight's Leggings ZX|''Knight's Leggings A ZX'']] |
||
| Line 504: | Line 504: | ||
|8 |
|8 |
||
|- |
|- |
||
| − | |[[File:Icon4Legs.png|link=Leg Armor| |
+ | |[[File:Icon4Legs.png|link=Leg Armor|center|11px]] |
|[[Candle Wolf|CW]] |
|[[Candle Wolf|CW]] |
||
|[[Kat Boots|''Kat Boots 4'']] |
|[[Kat Boots|''Kat Boots 4'']] |
||
Revision as of 09:46, 2 December 2021
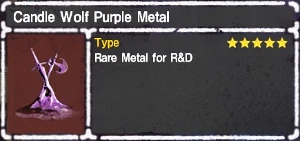
![]() Candle Wolf Purple Metal is a rare Faction Metal used for upgrading the highest tiers of Weapons and Armor at Chokufunsha.
Candle Wolf Purple Metal is a rare Faction Metal used for upgrading the highest tiers of Weapons and Armor at Chokufunsha.
Locations
Purple Metals are only obtainable from as a possible drop from Gold chests in Treasure rooms found on the floors 45-50
Gold chest/Treasure rooms are:
- 45F DOAME
- 45F GIOU
- 45F TAHEI
- 47F SAMINO
- 48F KIBARASE
- 48F JUSENJU
- 49F FUWA
- 49F NERI
- 50F NAKA-WARA
Note that a Purple Metal isn't guaranteed in most of the chests, only 50F NAKA-WARA gives a guaranteed Purple, but the higher the floor, the higher the chance.
May also be obtained as a reward from Lost Bags, appear in the daily Hernia lineup, and be bought once-per-day in the Bloodnium Exchange for ![]() 6000.
6000.
Uses
For all non-Event gear, it currently takes 745 to complete its uses. Event gear uses an additional 90, for an complete total of 835.
NOTE: Tier is a level of power typically based on the number of times equipment has changed forms, not the number of stars it has.
| Type | Faction | Name | Tier | Stars | Total |
|---|---|---|---|---|---|
| CW | Muramasa Blade S TDM | T4 | ★★★★★★ | 5 | |
| CW | Muramasa Blade S TDM | UC | ★★★★★★ | 30 | |
| CW | Thor's Wand S TDM | T4 | ★★★★★★ | 5 | |
| CW | Knight's Helm A ZX | T4 | ★★★★★ | 3 | |
| CW | Knight's Armor A ZX | T4 | ★★★★★ | 6 | |
| CW | Knight's Armor A ZX | UC | ★★★★★ | 15 | |
| CW | Kat Body 4 | UC | ★★★★ | 15 | |
| CW | Knight's Leggings A ZX | T4 | ★★★★★ | 8 | |
| CW | Kat Boots 4 | T4 | ★★★★ | 3 |