@DeletedUser40904999 (talk | contribs) (Fixing EmbedVideo URL args) |
Kaito 9562 (talk | contribs) No edit summary |
||
| (30 intermediate revisions by 7 users not shown) | |||
| Line 1: | Line 1: | ||
<metadesc>Welcome to the Let It Die Wiki! A resource for Let It Die players featuring guides, item descriptions, strategies, and more!</metadesc>__NOTOC____NOEDITSECTION__ |
<metadesc>Welcome to the Let It Die Wiki! A resource for Let It Die players featuring guides, item descriptions, strategies, and more!</metadesc>__NOTOC____NOEDITSECTION__ |
||
| − | <div id="welcome" class=" |
+ | <div id="welcome" class="fpbox"> |
| − | <div class=" |
+ | <div class="heading"><div class="nomobile" style="float:right;">[[File:Uncle Death.png|175px|link=]]</div>Welcome to the {{SITENAME}}!</div> |
| − | <div class=" |
+ | <div class="body"> |
| − | + | Your guide to the Tower! [[Special:ListUsers|{{NUMBEROFACTIVEUSERS}} active editors]] are currently maintaining [[Special:AllPages|{{NUMBEROFARTICLES}} articles ({{NUMBEROFPAGES}} total pages)]] and [[Special:ListFiles|{{NUMBEROFFILES}} files]]. Read the [[Let It Die Wiki:Wiki rules|Wiki rules]]. |
|
| − | </div><!-- End .mp-content --> |
||
| − | </div><!-- End #welcome --> |
||
| + | '''Official Links:''' [[File:IconBug.png|20px|link=https://www.letitdiethegame.com/news|Official Website]] [[File:YouTube.svg|20px|link=https://www.youtube.com/user/GungHoAmerica|Official Youtube Channel]] [[File:Twitter.svg|20px|link=https://twitter.com/letitdiethegame|Official Twitter]] [[File:Facebook.svg|20px|link=https://www.facebook.com/LetItDieTheGame|Official Facebook]] [[File:Twitch.svg|20px|link=https://www.twitch.tv/GungHoAmerica|Official Twitch]] [[File:ghlw.png|20px|link=http://www.gunghoonline.com/support/?gameid=2785|Support Ticket]] '''· Community Links:''' [[File:Reddit.svg|20px|link=https://www.reddit.com/r/LetItDie|Community Subreddit]] [[File:Discord.svg|20px|link=https://discord.gg/gdMZBbK|Community Discord]] [[File:Sheets 48dp.png|20px|link=https://docs.google.com/spreadsheets/d/1DvNDTmy_4P72C1ly4xMYItO6gb17EtdI3XuHFzAcX4Y/edit?usp=sharing|LID Rotations and Resources Table]] '''· Play Free:''' [[File:PlayStation_Store.svg|20px|link=https://store.playstation.com/en-us/grid/search-game/1?query=LET+IT+DIE|PS4: PlayStation Store]] [[File:Steam.svg|20px|link=https://store.steampowered.com/app/794600/LET_IT_DIE|Desktop: Steam]] |
||
| − | <div id="twitter" class="mp-block" style="flex: auto 0 0; float: left;"> |
||
| − | <div class="mp-heading">@letitdiethegame</div> |
||
| − | <div class="mp-content"> |
||
| − | {{twitter}} |
||
| − | </div><!-- End .mp-content --> |
||
| − | </div><!-- End #twitter --> |
||
| + | '''[[Let It Die Wiki:Tasks|<span style="font-size: 12pt; color: #CC0000">Help Needed.]]''' <small>''Let It Die Wiki is short on editors. Please help us in any way you can.''</small> |
||
| − | <div id="mp-layout"> |
||
| + | </div> |
||
| − | <div id="gameplay" class="mp-block" style="flex: 100%;"> |
||
| + | </div><!-- End #welcome --> |
||
| − | <div class="mp-heading">Game</div> |
||
| − | <div class="mp-content"> |
||
| − | {| style="width:100%; border-spacing: 2px;" |
||
| − | |- style="vertical-align: top;" |
||
| − | |'''[[Game Information|<span style="color: white;">Important Game Information</span>]]''' |
||
| + | <div class="fp-container"> |
||
| − | *[https://www.letitdiethegame.com Official Website] |
||
| + | <div id="gameplay" class="fpbox"> |
||
| − | *[https://discord.gg/ Official Discord Channel] |
||
| + | <div class="heading">Game</div> |
||
| − | *[https://www.letitdiethegame.com/support.html Contact and Support] |
||
| + | <div class="body multi-column"> |
||
| − | *[https://www.letitdiethegame.com/news.html News] |
||
| + | <div class="column"> |
||
| + | ;Game Information |
||
| + | <ul> |
||
| + | <li>[[File:IconStory.png|link=Story]] [[Story]]</li> |
||
| + | <li>[[File:IconUncleD.png|link=Characters]] [[Characters]]</li> |
||
| + | <li>[[File:IconDirectHell.png|link=Direct Hell Insurance]] [[Direct Hell Insurance|Direct Hell]]</li> |
||
| + | <li>[[File:IconCap.png|link=Login Bonuses]] [[Login Bonuses]]</li> |
||
| + | <li>[[File:IconGuide.png|link=Player Guides]] [[Player Guides]]</li> |
||
| + | <li>[[File:IconRadio.png|link=Radio]] [[Radio]]</li> |
||
| + | </ul> |
||
| + | </div> |
||
| + | <div class="column"> |
||
| + | ;Locations |
||
| + | <ul> |
||
| + | <li>[[File:IconTower.png|link=Tower of Barbs]] [[Tower of Barbs]]</li> |
||
| + | <li>[[File:IconWR.png|link=Waiting Room]] [[Waiting Room]]</li> |
||
| + | <li>[[File:IconArcade.png|link=Hated Arcade]] [[Hated Arcade]]</li> |
||
| + | <li>[[File:IconTetsuo.png|link=Tokyo Death Metro]] <small>[[Tokyo Death Metro]]</small></li> |
||
| + | <li>[[File:IconBTTT.png|link=Battle To The Top]] <small>[[Battle To The Top]]</small></li> |
||
| + | <li>[[File:IconTengoku.png|link=Tengoku]] [[Tengoku]]</li> |
||
| + | </ul> |
||
| + | </div> |
||
| + | <div class="column"> |
||
| + | ;Services |
||
| + | <ul> |
||
| + | <li>[[File:IconFighters.png|link=Fighters]] [[Fighters|Fighter Freezer]]</li> |
||
| + | <li>[[File:IconQuests.png|link=Quests]] [[Quests]]</li> |
||
| + | <li>[[File:IconClub.png|link=Shrooms]] [[Shrooms|Mushroom Club]]</li> |
||
| + | <li>[[File:IconChoku.png|link=Chokufunsha]] [[Chokufunsha]]</li> |
||
| + | <li>[[File:IconGyaku.png|link=Gyakufunsha]] [[Gyakufunsha]]</li> |
||
| + | <li>[[File:IconHernia.png|link=Hernia]] [[Hernia]]</li> |
||
| + | </ul> |
||
| + | </div> |
||
| + | <div class="column"> |
||
| + | ;Enemies |
||
| + | <ul> |
||
| + | <li>[[File:IconEnemies.png|link=Enemies]] [[Enemies]]</li> |
||
| + | <li>[[File:IconBoss.png|link=Bosses]] [[Bosses]]</li> |
||
| + | <li>[[File:Icon44CE.png|link=Forcemen]] [[Forcemen|Four Forcemen]]</li> |
||
| + | <li>[[File:IconJackals.png|link=Jackals]] [[Jackals]]</li> |
||
| + | <li>[[File:IconJackalsV3.png|link=Awakened Jackals]] <small>[[Awakened Jackals]]</small></li> |
||
| + | </ul> |
||
| + | </div> |
||
| + | <div class="column"> |
||
| + | ;Items & Equipment |
||
| + | <ul> |
||
| + | <li>[[File:IconWeapon.png|link=Weapons]] [[Weapons]]</li> |
||
| + | <li>[[File:IconArmor.png|link=Armor]] [[Armor]]</li> |
||
| + | <li>[[File:IconBP.png|link=Blueprints]] [[Blueprints]]</li> |
||
| + | <li>[[File:IconMaterials.png|link=R&D Materials]] [[R&D Materials]]</li> |
||
| + | <li>[[File:IconShroom.png|link=Shrooms]] [[Mushrooms]]</li> |
||
| + | <li>[[File:IconBeast.png|link=Beasts]] [[Beasts]]</li> |
||
| + | <li>[[File:IconDecals.png|link=Skill Decals]] [[Skill Decals]]</li> |
||
| + | </ul> |
||
| + | </div> |
||
| + | </div> |
||
| + | </div><!-- End #gameplay --> |
||
| + | <div id="about" class="fpbox"> |
||
| − | '''[[Social Media|<span style="color: white;">Social Media</span>]]''' |
||
| + | <div class="heading">About Let It Die</div> |
||
| − | *[https://www.youtube.com/user/GungHoAmerica Official Youtube] |
||
| + | <div class="body" style="padding-left: 1em;"> |
||
| − | *[https://www.facebook.com/LetItDieTheGame/ Facebook] |
||
| + | <small><p>In the year 2026 AD, a large tectonic disturbance caused mass destruction around the world. In the midst of the destruction, South Western Tokyo split off into the ocean where the seismic activity caused a large spire to rise out of the ocean piercing the island creating a tower-like structure deemed holy by some. Under the watchful eye of Uncle Death, madness has spread across the world...</p> |
||
| − | *[https://twitter.com/letitdiethegame Twitter] |
||
| + | <p>Fight your way to the top in this chaotic and pulp survival action taking free-to-play to a whole new level. Begin your journey in your underwear and survive by any means necessary while taking advice from Uncle Death, a skateboarding reaper. Rumor has it that a sacred treasure awaits at the top of the Tower of Barbs for those that survive the climb. Many dangers and mysteries remain hidden from the eyes of mankind and await those courageous enough to dare approach the tower.</p></small> |
||
| − | |'''Main Links''' |
||
| + | </div> |
||
| − | * [[Story]] |
||
| + | </div><!-- End #about --> |
||
| − | * [[Tower of Barbs]] |
||
| − | * [[Tokyo Death Metro]] |
||
| − | * [[Enemies]] |
||
| + | <div id="twitter" class="fpbox"> |
||
| − | ; Locations |
||
| + | <div class="heading">@LETITDIETheGame</div> |
||
| − | * [[Arcade]] |
||
| + | <div class="body"> |
||
| − | * [[Waiting Room]] |
||
| + | {{twitter}} |
||
| − | * [[Gyakufunsya|Wandering Shop]] |
||
| + | </div> |
||
| + | </div><!-- End #twitter --> |
||
| + | <div id="videos" class="fpbox"> |
||
| − | |'''Mid-Bosses''' |
||
| + | <div class="heading">Latest Video</div> |
||
| − | * [[COEN]] |
||
| + | <div class="body" style="text-align:center;"> |
||
| − | * [[JIN-DIE]] |
||
| + | {{#evt: |
||
| − | * [[GOTO-9]] |
||
| + | service=youtube |
||
| − | * [[U-10]] |
||
| + | |id=https://www.youtube.com/watch?v=WptEincGYHg |
||
| − | * [[Dons|Tower Dons (Spoilers!)]] |
||
| + | |dimensions=500x435 |
||
| − | * [[Jackals]] |
||
| + | |alignment=center |
||
| + | }} |
||
| + | </div> |
||
| + | </div><!-- End #videos --> |
||
| + | <div id="roadmap" class="fpbox"> |
||
| − | |'''Items & Equipment''' |
||
| + | <div class="heading">Roadmap</div> |
||
| − | * [[Weapons]] |
||
| + | <div class="body" style="text-align:center;"> |
||
| − | * [[Armor]] |
||
| + | [[File:Season 15.png|500px]] |
||
| − | * [[Skill Decals]] |
||
| + | </div> |
||
| − | * [[Blueprints]] |
||
| + | </div><!-- End #roadmap--> |
||
| − | * [[R&D Materials]] |
||
| − | * [[Mushrooms]] |
||
| − | * [[Beasts]] |
||
| + | <div id="currentEvents" class="fpbox"> |
||
| − | | [[Gameplay|<span style="color: white;">Gameplay</span>]] |
||
| + | <div class="heading">Current Events</div> |
||
| − | * [[Underworld Rolodex]] |
||
| + | <div class="body" style="text-align:center;"> |
||
| − | * [[Fighters]] |
||
| + | [[File:SpringEggScramble.png|link=https://www.letitdiethegame.com/news.html#/5603/|center|400px]] |
||
| − | * [[Expeditions]] |
||
| + | '''[https://www.letitdiethegame.com/news.html#/5734/ Spring Egg Scramble!]''' |
||
| − | * [[Quests]] |
||
| + | [[File:BattleRush.png|link=https://www.letitdiethegame.com/news.html#/5605/|center|400px|center|400px]] |
||
| + | '''[https://www.letitdiethegame.com/news.html#/5732/ TDM Battle Rush: Season 15]''' |
||
| + | </div> |
||
| + | </div><!-- End #currentEvents--> |
||
| + | <div id="daily" class="fpbox"> |
||
| − | ; Misc |
||
| + | <div class="heading">Daily</div> |
||
| − | * [[Underworld Rolodex]] |
||
| + | <div class="body"> |
||
| − | |} |
||
| + | <!-- The contents of #rotatingDaily are generated through code in [[Mediawiki:Common.js]] to avoid caching. If the JS successfully loads, it will replace the wikitext switch below. If it does not, the wikitext serves as a fallback. --> |
||
| − | </div><!-- End .mp-content --> |
||
| + | <div id="rotatingDaily"> |
||
| − | </div><!-- End #gameplay --> |
||
| + | <!-- Current day of the week, changing at 10 am (if hour is before 10, subtract 1 from DOW to get previous DOW) --> |
||
| + | {{#switch:{{#expr:{{CURRENTDOW}}-{{#ifexpr:{{CURRENTHOUR}}>=10|0|1}}}} |
||
| + | | 0 = {{Sunday}} |
||
| + | | 1 = {{Monday}} |
||
| + | | 2 = {{Tuesday}} |
||
| + | | 3 = {{Wednesday}} |
||
| + | | 4 = {{Thursday}} |
||
| + | | 5 = {{Friday}} |
||
| + | | 6 |
||
| + | | -1 = {{Saturday}} |
||
| + | }} |
||
| + | </div> |
||
| + | <!-- The contents of #rotatingExpress are generated through code in [[Mediawiki:Common.js]] to avoid caching. If the JS successfully loads, it will replace the wikitext switch below. If it does not, the wikitext serves as a fallback. --> |
||
| + | <div id="rotatingExpress"> |
||
| + | <!-- |
||
| + | use epoch time to cycle through a 6-day period every day at 10 am UTC |
||
| + | 86400 is seconds in a day |
||
| + | --> |
||
| + | {{#switch:{{#expr:floor(({{#time:U}} / 86400) mod 6) - {{#ifexpr:{{CURRENTHOUR}}>=10|0|1}}}} |
||
| + | | 0 = {{ExpressDecal3}} |
||
| + | | 1 = {{ExpressDecal4}} |
||
| + | | 2 = {{ExpressDecal5}} |
||
| + | | 3 = {{ExpressDecal6}} |
||
| + | | 4 = {{ExpressDecal1}} |
||
| + | | 5 |
||
| + | | -1 = {{ExpressDecal2}} |
||
| + | }} |
||
| + | </div> |
||
| + | </div> |
||
| + | </div><!-- End #roadmap--> |
||
| − | <div id=" |
+ | <div id="tdmSeason" class="fpbox"> |
| − | <div class=" |
+ | <div class="heading">TDM Season</div> |
| + | <div class="body" style="text-align:center;"> |
||
| − | {{header|About Let It Die|[[File:Uncle Death.png|180px]]}} |
||
| + | {{TDMSeason}} |
||
| − | <div style="padding-left: 1em;"> |
||
| + | </div> |
||
| − | The [[Story]]: In the year 2026 AD, a large tectonic disturbance occurred causing mass destruction around the world. Southwestern [https://en.wikipedia.org/wiki/Tokyo Tokyo] split off into the ocean and became an island covered by a deep fog. Continuous seismic activity then caused a large spire to rise out of the ocean through the island, creating a tower-like structure that pierces the clouds. Many mysteries remain hidden from the eyes of mankind, awaiting those courageous enough to dare approach the tower... |
||
| + | </div><!-- End #tdmSeason--> |
||
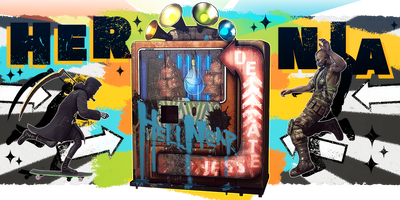
| + | <div id="hernia" class="fpbox"> |
||
| − | [[Characters]]: [[Fighters]] enter the world with nothing but their underwear and must fight to survive in the post-apocalyptic world that awaits them. [[Enemies]] defeated may drop [[Weapons]] and [[Armor]] for players, which may be the difference between life and death... |
||
| + | <div class="heading">Hernia</div> |
||
| + | <div class="body" style="text-align:center;"> |
||
| + | <!-- The contents of #rotatingHernia are generated through code in [[Mediawiki:Common.js]] to avoid caching. If the JS successfully loads, it will replace the wikitext switch below. If it does not, the wikitext serves as a fallback. --> |
||
| + | <div id="rotatingHernia"> |
||
| + | <!-- |
||
| + | Advance every week on thursdays at 10 am UTC. Because 5 does not divide evenly into 52, using CURRENTWEEK here would cause problems at the end of the year. So we use epoch time instead. |
||
| + | 604800 is seconds in a week |
||
| + | --> |
||
| + | {{#switch:{{#expr:(floor({{#time:U}} / 604800) - {{#ifexpr:{{CURRENTDOW}}>5 or ({{CURRENTDOW}}=5 and {{CURRENTHOUR}}>=10)|0|1}}) mod 5}} |
||
| + | | 0 = {{HerniaBP5}} |
||
| + | | 1 = {{HerniaBP1}} |
||
| + | | 2 = {{HerniaBP2}} |
||
| + | | 3 = {{HerniaBP3}} |
||
| + | | 4 |
||
| + | | -1 = {{HerniaBP4}} |
||
| + | }} |
||
| + | </div> |
||
| + | {{HerniaWeapon}} |
||
| + | </div> |
||
| + | </div><!-- End #hernia--> |
||
| + | <div id="chargers" class="fpbox"> |
||
| − | [[Gameplay]]: Players fight through the treacherous [[Tower of Barbs]] obtaining various types of [[weapons]] and [[armor]] while finding [[beasts]] and [[shrooms]] to eat in order to stay alive. Upon death, a player’s "death data" is then circulated among other player’s games where they will appear as formidable opponents. The sharing of "death data" is one of the various asynchronous multiplayer elements that can be found in the game. |
||
| + | <div class="heading">Yotsuyama Chargers</div> |
||
| + | <div class="body" style="text-align:center;"> |
||
| + | <!-- The contents of #rotatingChargers are generated through code in [[Mediawiki:Common.js]] to avoid caching. If the JS successfully loads, it will replace the wikitext switch below. If it does not, the wikitext serves as a fallback. --> |
||
| + | <div id="rotatingChargers"> |
||
| + | <!-- Swap every week on thursdays at 10 am UTC --> |
||
| + | {{#switch:{{#expr:({{CURRENTWEEK}} - {{#ifexpr:{{CURRENTDOW}}>5 or ({{CURRENTDOW}}=5 and {{CURRENTHOUR}}>=10)|0|1}}) mod 2}} |
||
| + | | 0 = {{Chargers2}} |
||
| + | | 1 |
||
| + | | -1 = {{Chargers1}} |
||
| + | }} |
||
| + | </div> |
||
| + | </div> |
||
| + | </div><!-- End #chargers--> |
||
| + | <div id="seasonQuests" class="fpbox"> |
||
| − | <div style="padding-left: 5em;"><div style="padding-right: 5em;"><center>Let It Die is a free to play game currently available on PlayStation 4.</center></div> |
||
| − | < |
+ | <div class="heading">Season Quests</div> |
| + | <div class="body" style="text-align:center;"> |
||
| − | </div><!-- End .mp-content --> |
||
| + | {{SeasonQuests}} |
||
| − | </div><!-- End #about --> |
||
| + | {{Spring}} |
||
| + | </div> |
||
| + | </div><!-- End #seasonQuests--> |
||
| + | <div id="weeklyQuests" class="fpbox"> |
||
| − | </div><!-- End #mp-layout--> |
||
| + | <div class="heading">Weekly Quests</div> |
||
| − | |||
| − | <div |
+ | <div class="body" style="text-align:center;"> |
| + | <!-- The contents of #rotatingWeekly are generated through code in [[Mediawiki:Common.js]] to avoid caching. If the JS successfully loads, it will replace the wikitext switch below. If it does not, the wikitext serves as a fallback. --> |
||
| − | <div class="mp-heading">Videos</div> |
||
| + | <div id="rotatingWeekly"> |
||
| − | <div class="mp-content" style="flex-wrap: wrap; flex-direction: column;"> |
||
| + | <!-- Advance every week on mondays at 10 am UTC --> |
||
| − | |||
| + | {{#switch:{{#expr:({{CURRENTWEEK}} - {{#ifexpr:{{CURRENTDOW}}>1 or ({{CURRENTDOW}}=1 and {{CURRENTHOUR}}>=10)|0|1}}) mod 4}} |
||
| − | <div style="display: flex; flex-wrap: wrap; flex-direction: row;"> |
||
| + | | 0 = {{BlackThunderWeek}} |
||
| − | {{#ev:twitchvod|v140131128|||||autoplay=false}} |
||
| + | | 1 = {{PaleWindWeek}} |
||
| − | {{#ev:twitchvod|v140132471|||||autoplay=false}} |
||
| + | | 2 = {{WhiteSteelWeek}} |
||
| + | | 3 |
||
| + | | -1 = {{RedNapalmWeek}} |
||
| + | }} |
||
</div> |
</div> |
||
| − | <div style="display: flex; flex-wrap: wrap; flex-direction: row;"> |
||
| − | {{#ev:twitchvod|v140134665|||||autoplay=false}} |
||
| − | {{#ev:twitchvod|v140135640|||||autoplay=false}} |
||
</div> |
</div> |
||
| + | </div><!-- End #weeklyQuests--> |
||
| + | <div id="discord" class="fpbox"> |
||
| − | </div><!-- End .mp-content --> |
||
| + | <div class="heading">Community Discord</div> |
||
| − | </div><!-- End #video --> |
||
| + | <div class="body" style="text-align:center;"> |
||
| − | |||
| + | {{#widget:Discord|id=256677044174323713}} |
||
| − | <div id="screenshots" class="mp-block"> |
||
| + | </div> |
||
| − | <div class="mp-heading" style="min-width: 232px;">Let It Die Screenshots</div> |
||
| − | <div |
+ | </div><!-- End #discord--> |
| − | <center> |
||
| − | <gallery widths=200px> |
||
| − | File:1.jpg |
||
| − | File:2.jpg |
||
| − | File:3.jpg |
||
| − | File:5.jpg |
||
| − | File:6.jpg |
||
| − | File:7.jpg |
||
| − | </gallery> |
||
| − | </center> |
||
| − | {|width="100%" |
||
| − | | |
||
| − | |align="right"| [[Screenshots|Additional Media]] |
||
| − | |} |
||
| − | </div><!-- End .mp-content --> |
||
| − | </div><!-- End #screenshots--> |
||
| + | </div> |
||
| + | [[Category:Let It Die Wiki| ]] |
||
| + | __NOTITLE__ |
||
| − | |||
| − | [[Category:Let It Die Wiki| ]] |
||
Revision as of 15:09, 2 April 2021

Your guide to the Tower! 2 active editors are currently maintaining 893 articles (6,024 total pages) and 3,712 files. Read the Wiki rules.
Official Links: ![]()
![]()
![]()
![]()
![]()
![]() · Community Links:
· Community Links: ![]()
![]()
![]() · Play Free:
· Play Free: ![]()
![]()
Help Needed. Let It Die Wiki is short on editors. Please help us in any way you can.
- Game Information


- Items & Equipment


In the year 2026 AD, a large tectonic disturbance caused mass destruction around the world. In the midst of the destruction, South Western Tokyo split off into the ocean where the seismic activity caused a large spire to rise out of the ocean piercing the island creating a tower-like structure deemed holy by some. Under the watchful eye of Uncle Death, madness has spread across the world...
Fight your way to the top in this chaotic and pulp survival action taking free-to-play to a whole new level. Begin your journey in your underwear and survive by any means necessary while taking advice from Uncle Death, a skateboarding reaper. Rumor has it that a sacred treasure awaits at the top of the Tower of Barbs for those that survive the climb. Many dangers and mysteries remain hidden from the eyes of mankind and await those courageous enough to dare approach the tower.


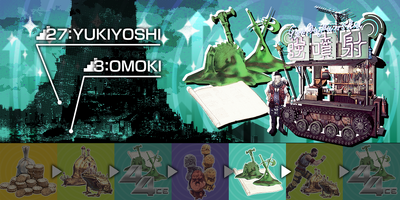 |
| Friday's Tectonic Terror: Gyakufunsha's Moving Cart!! |
|---|
| Area: 3F OMOKI & 27F YUKIYOSHI Schedule: FRI 10:00 – SAT 09:59 (UTC) Special: Increased rate for Gyakufunsha appearing in this area. Tomorrow: Golden Beasts Galore & Hate Thy Neighbor!! |
| Daily Express Pass Login Bonus | |
|---|---|

|
 |
| Super Long Tail ★★★★ | Fun Fungus |
| Reduces the durability lossof equipment and weapons by 20%. | Endurance Heal 50 / 100% |
| *Non-Premium decals are lost upon removal. | |
| Tomorrow: Golden Lucky Cat + 40,000 Kill Coins | |
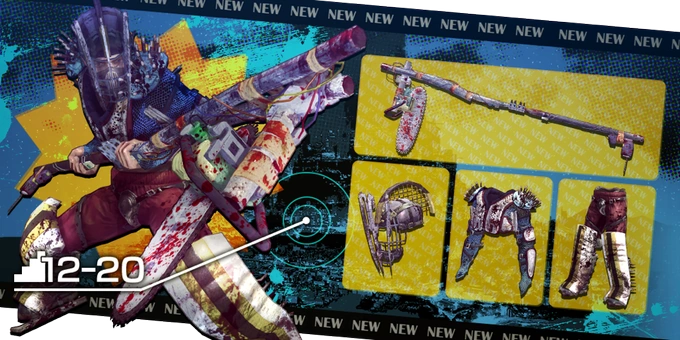
| TDM Battle Rush: Season 27 March 25th, 2024 - June 24, 2024 | |
|---|---|
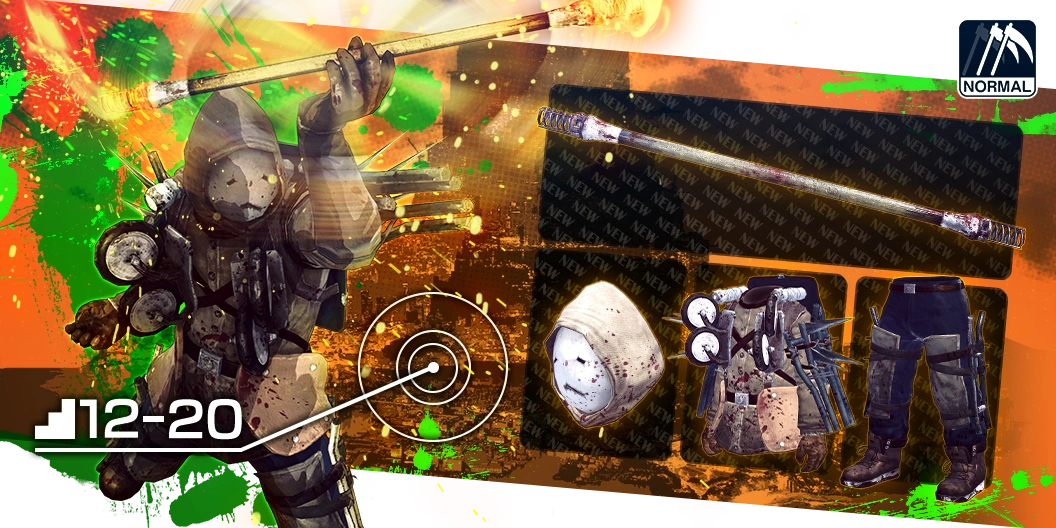
| New Blueprints | |
 |
 |
| Hunting Bow | Combat Diver Set |
| From | |
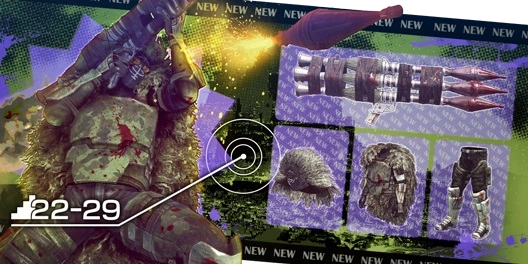
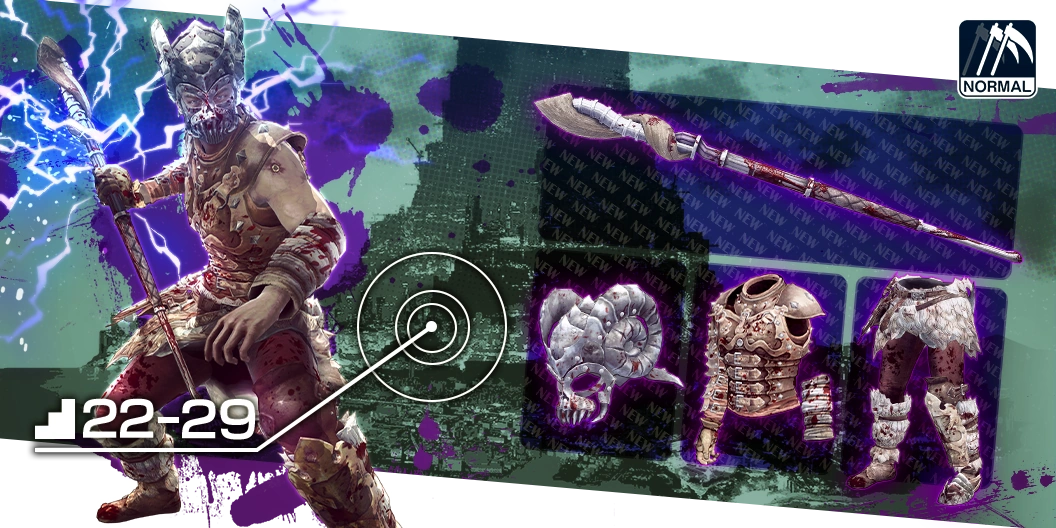
| Last Season's Blueprints | |
 |
|
| Striker Flail | Kendo Set |
| From | |
| TDM Season Finale Rank Reward | |

| |
| TDM Saber | |
| Be in Diamond Rank when Season 27 ends on 6/24 for the strongest TDM Saber! Silver / Gold / Platinum Rank forms cannot upgrade to a higher tier. | |
 | |||
| Weekly Blueprints | |||
|---|---|---|---|
 |
 |
 |
 |
| Striker Flail | Kendo Set | ||
 |
 |
 |
 |
| Hunting Bow | Combat Diver Set | ||
Blueprints already handed in to Choku-Funsha cannot be purchased. | |||
| Monthly Tengoku Weapon | |||

| |||
| Thunderbolt · | |||
| This is a built weapon; not a blueprint. Stock refreshes daily; weapon changes monthly. | |||
Thunderbolt
| Kill the Yotsuyama Chargers for their weapons and armor! 4 appear each week, rotating each Thursday at 10:00 UTC. |
| This Week's Chargers: |
|---|
|
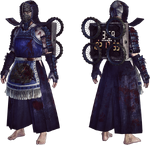
| Chainsaw Viper · Apocalyptic Hockey Set |
|
| Fireball Baton · Happy Wheeler Set |
|
| M-404 Rocket Launcher · Silent Sniper Set |
|
| Lightning Wand · Warrior Set |
 | |
| Quest | Reward |
|---|---|
| Defeat SCREAMER x1000. | |
| Defeat Haters: x1000. | |
| Capture 500 beast(s). | |
| Collect 500 mushroom(s). | |
| Successfully Attack in TDM x100. | |
| Successfully Defend in TDM x50. | |
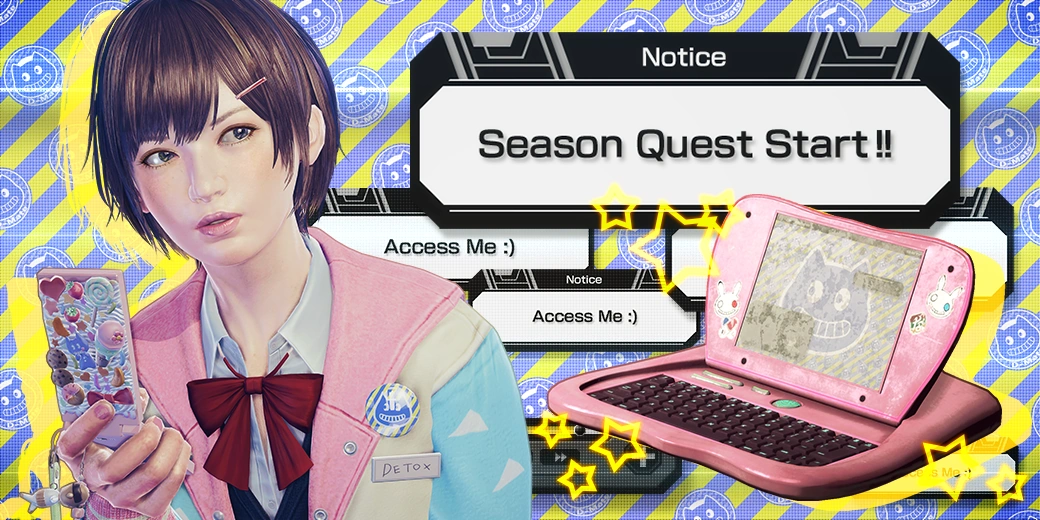
 | |
| Quest | Reward |
|---|---|
| Collect Bronze Eggshroom x20 in the tower. | |
| Collect Silver Eggshroom x10 in the tower. | |
| Collect Golden Eggshroom x5 in the tower. | |
 | |
| Quest | Reward |
|---|---|
| Defeat SCREAMER x50. | |
| Defeat Haters in the Tower of Barbs: x50. | |
| Defeat any of the Jackals. | |
| Defeat Mr. Crowley. | |
| Capture 20 beast(s) in the tower. | |
| Collect 20 mushroom(s) in the tower. | |
| Successfully Attack in Tokyo Death Metro 5 times. | |
| Successfully Defend in Tokyo Death Metro 5 times. | |
| Defeat Black Thunder(HARD). | |
| Defeat Black Thunder(HARD). | |
| Defeat Black Thunder(NIGHTMARE). | |
| Defeat Black Thunder(NIGHTMARE). | |
| Reach Floor 60F in the Tower of Barbs. | |
| Reach Floor 80F in the Tower of Barbs. | |
| Reach Floor 100F in the Tower of Barbs. | |
| Reach Floor 120F in the Tower of Barbs. | |
Completed Quests must be turned in before the reset to receive rewards. | |
{{#widget:Discord|id=256677044174323713}}