TylerBlount1994 (talk | contribs) No edit summary Tag: Source edit |
TylerBlount1994 (talk | contribs) No edit summary Tag: Source edit |
||
| (5 intermediate revisions by 3 users not shown) | |||
| Line 13: | Line 13: | ||
== Uses == |
== Uses == |
||
| − | For all non-Event gear, it currently takes ''' |
+ | For all non-Event gear, it currently takes '''635''' Reversal Metal to complete its uses. Event gear uses an additional '''5''', for a complete total of '''640'''. |
'''NOTE:''' Tier is a level of power typically based on the number of times equipment has changed forms, not the number of stars it has. |
'''NOTE:''' Tier is a level of power typically based on the number of times equipment has changed forms, not the number of stars it has. |
||
| Line 20: | Line 20: | ||
|+Reversal Metal |
|+Reversal Metal |
||
!Type |
!Type |
||
| − | !Faction |
+ | !<abbr title="Faction">F</abbr> |
!Name |
!Name |
||
!Tier |
!Tier |
||
!Stars |
!Stars |
||
| + | !# |
||
| − | !Total |
||
| + | |- |
||
| + | |[[File:Icon1Weapon.png|link=Weapons|center|14px]] |
||
| + | |[[D.O.D. ARMS|DOD]] |
||
| + | |[[Drill Buster]] |
||
| + | |T3 |
||
| + | |<font color="gold">★★★★★</font> |
||
| + | |10 |
||
| + | |- |
||
| + | |[[File:Icon1Weapon.png|link=Weapons|center|14px]] |
||
| + | |[[D.O.D. ARMS|DOD]] |
||
| + | |[[Drill Buster +]] |
||
| + | |T4 |
||
| + | |<font color="gold">★★★★★★</font> |
||
| + | |10 |
||
|- |
|- |
||
|[[File:Icon1Weapon.png|link=Weapons|center|14px]] |
|[[File:Icon1Weapon.png|link=Weapons|center|14px]] |
||
| Line 42: | Line 56: | ||
|[[File:Icon1Weapon.png|link=Weapons|center|14px]] |
|[[File:Icon1Weapon.png|link=Weapons|center|14px]] |
||
|[[D.O.D. ARMS|DOD]] |
|[[D.O.D. ARMS|DOD]] |
||
| − | |[[ |
+ | |[[Timber Riot]] |
|T3 |
|T3 |
||
|<font color="gold">★★★★★</font> |
|<font color="gold">★★★★★</font> |
||
| Line 49: | Line 63: | ||
|[[File:Icon1Weapon.png|link=Weapons|center|14px]] |
|[[File:Icon1Weapon.png|link=Weapons|center|14px]] |
||
|[[D.O.D. ARMS|DOD]] |
|[[D.O.D. ARMS|DOD]] |
||
| − | |[[ |
+ | |[[Timber Riot +]] |
|T4 |
|T4 |
||
|<font color="gold">★★★★★★</font> |
|<font color="gold">★★★★★★</font> |
||
|10 |
|10 |
||
| + | |- |
||
| + | |[[File:Icon1Weapon.png|link=Weapons|center|14px]] |
||
| + | |[[D.O.D. ARMS|DOD]] |
||
| + | |[[Death Stalker]] |
||
| + | |T4 |
||
| + | |<font color="gold">★★★★★★★</font> |
||
| + | |60 |
||
| + | |- |
||
| + | |[[File:Icon1Weapon.png|link=Weapons|center|14px]] |
||
| + | |[[War Ensemble|WE]] |
||
| + | |[[FFWF-285 Flamethrower E]] |
||
| + | |T4 |
||
| + | |<font color="gold">★★★★★★★</font> |
||
| + | |15 |
||
|- |
|- |
||
|[[File:Icon1Weapon.png|link=Weapons|center|14px]] |
|[[File:Icon1Weapon.png|link=Weapons|center|14px]] |
||
| Line 66: | Line 94: | ||
|T3 |
|T3 |
||
|<font color="gold">★★★★</font> |
|<font color="gold">★★★★</font> |
||
| + | |8 |
||
| + | |- |
||
| + | |[[File:Icon1Weapon.png|link=Weapons|center|14px]] |
||
| + | |[[War Ensemble|WE]] |
||
| + | |[[Special Forces Shovel]] |
||
| + | |T3 |
||
| + | |<font color="gold">★★★★★</font> |
||
|8 |
|8 |
||
|- |
|- |
||
| Line 195: | Line 230: | ||
|- |
|- |
||
|[[File:Icon1Weapon.png|link=Weapons|center|14px]] |
|[[File:Icon1Weapon.png|link=Weapons|center|14px]] |
||
| + | |[[M.I.L.K.|MILK]] |
||
| − | |None |
||
|[[Jackal Yo-Yo]] |
|[[Jackal Yo-Yo]] |
||
|T3 |
|T3 |
||
| Line 219: | Line 254: | ||
|[[Steel God Mask +]] |
|[[Steel God Mask +]] |
||
|T4 |
|T4 |
||
| + | |<font color="gold">★★★★</font> |
||
| + | |5 |
||
| + | |- |
||
| + | |[[File:Icon2Head.png|link=Head Armor|center|16px]] |
||
| + | |[[War Ensemble|WE]] |
||
| + | |[[Skull Punisher Head]] |
||
| + | |T3 |
||
|<font color="gold">★★★★</font> |
|<font color="gold">★★★★</font> |
||
|5 |
|5 |
||
| Line 256: | Line 298: | ||
|<font color="gold">★★★★★★</font> |
|<font color="gold">★★★★★★</font> |
||
|5 |
|5 |
||
| + | |- |
||
| + | |[[File:Icon2Head.png|link=Head Armor|center|16px]] |
||
| + | |[[Candle Wolf|CW]] |
||
| + | |[[Manic Wizard Cowl]] |
||
| + | |T3 |
||
| + | |<font color="gold">★★★★</font> |
||
| + | |11 |
||
|- |
|- |
||
|[[File:Icon2Head.png|link=Head Armor|center|16px]] |
|[[File:Icon2Head.png|link=Head Armor|center|16px]] |
||
| Line 279: | Line 328: | ||
|- |
|- |
||
|[[File:Icon2Head.png|link=Head Armor|center|16px]] |
|[[File:Icon2Head.png|link=Head Armor|center|16px]] |
||
| + | |[[War Ensemble|WE]] |
||
| − | |None |
||
|[[Jackal Y Head]] |
|[[Jackal Y Head]] |
||
|T3 |
|T3 |
||
| Line 286: | Line 335: | ||
|- |
|- |
||
|[[File:Icon2Head.png|link=Head Armor|center|16px]] |
|[[File:Icon2Head.png|link=Head Armor|center|16px]] |
||
| + | |[[Candle Wolf|CW]] |
||
| − | |None |
||
|[[Fencer's Mask N]] |
|[[Fencer's Mask N]] |
||
|T4 |
|T4 |
||
|<font color="gold">★★★★★★★</font> |
|<font color="gold">★★★★★★★</font> |
||
| − | | |
+ | |25 |
|- |
|- |
||
|[[File:Icon3Body.png|link=Body Armor|center|18px]] |
|[[File:Icon3Body.png|link=Body Armor|center|18px]] |
||
| Line 297: | Line 346: | ||
|T4 |
|T4 |
||
|<font color="gold">★★★★</font> |
|<font color="gold">★★★★</font> |
||
| + | |5 |
||
| + | |- |
||
| + | |[[File:Icon3Body.png|link=Body Armor|center|18px]] |
||
| + | |[[D.O.D. ARMS|DOD]] |
||
| + | |[[Alien Roadster Body +]] |
||
| + | |T4 |
||
| + | |<font color="gold">★★★★★★</font> |
||
|5 |
|5 |
||
|- |
|- |
||
| Line 340: | Line 396: | ||
|<font color="gold">★★★★★★</font> |
|<font color="gold">★★★★★★</font> |
||
|5 |
|5 |
||
| + | |- |
||
| + | |[[File:Icon3Body.png|link=Body Armor|center|18px]] |
||
| + | |[[Candle Wolf|CW]] |
||
| + | |[[Berserker Armor S]] |
||
| + | |T4 |
||
| + | |<font color="gold">★★★★★★</font> |
||
| + | |10 |
||
|- |
|- |
||
|[[File:Icon3Body.png|link=Body Armor|center|18px]] |
|[[File:Icon3Body.png|link=Body Armor|center|18px]] |
||
| Line 368: | Line 431: | ||
|<font color="gold">★★★</font> |
|<font color="gold">★★★</font> |
||
|8 |
|8 |
||
| + | |- |
||
| + | |[[File:Icon3Body.png|link=Body Armor|center|18px]] |
||
| + | |[[M.I.L.K.|MILK]] |
||
| + | |[[Blood Diver Body]] |
||
| + | |T3 |
||
| + | |<font color="gold">★★★★★</font> |
||
| + | |6 |
||
| + | |- |
||
| + | |[[File:Icon4Legs.png|link=Leg Armor|center|11px]] |
||
| + | |[[D.O.D. ARMS|DOD]] |
||
| + | |[[Wheel Assassin Pants +]] |
||
| + | |T4 |
||
| + | |<font color="gold">★★★★★★</font> |
||
| + | |5 |
||
|- |
|- |
||
|[[File:Icon4Legs.png|link=Leg Armor|center|11px]] |
|[[File:Icon4Legs.png|link=Leg Armor|center|11px]] |
||
| Line 382: | Line 459: | ||
|<font color="gold">★★★★</font> |
|<font color="gold">★★★★</font> |
||
|8 |
|8 |
||
| + | |- |
||
| + | |[[File:Icon4Legs.png|link=Leg Armor|center|11px]] |
||
| + | |[[Candle Wolf|CW]] |
||
| ⚫ | |||
| + | |T3 |
||
| + | |<font color="gold">★★★★</font> |
||
| + | |8 |
||
| + | |- |
||
| + | |[[File:Icon4Legs.png|link=Leg Armor|center|11px]] |
||
| + | |[[Candle Wolf|CW]] |
||
| + | |[[Swordmaster Leggings S]] |
||
| + | |T4 |
||
| + | |<font color="gold">★★★★★★</font> |
||
| + | |15 |
||
|- |
|- |
||
|[[File:Icon4Legs.png|link=Leg Armor|center|11px]] |
|[[File:Icon4Legs.png|link=Leg Armor|center|11px]] |
||
| Line 395: | Line 486: | ||
|T3 |
|T3 |
||
|<font color="gold">★★★★★</font> |
|<font color="gold">★★★★★</font> |
||
| − | | |
+ | |10 |
|- |
|- |
||
|[[File:Icon4Legs.png|link=Leg Armor|center|11px]] |
|[[File:Icon4Legs.png|link=Leg Armor|center|11px]] |
||
| Line 437: | Line 528: | ||
|+Event Gear |
|+Event Gear |
||
!Type |
!Type |
||
| − | !Faction |
+ | !<abbr title="Faction">F</abbr> |
!Name |
!Name |
||
!Tier |
!Tier |
||
!Stars |
!Stars |
||
| + | !# |
||
| − | !Total |
||
|- |
|- |
||
| − | |[[File: |
+ | |[[File:Icon2Head.png|link=Head Armor|center|16px]] |
| − | |[[ |
+ | |[[D.O.D. ARMS|DOD]] |
| + | |[[Travis' Sunglasses 3|''Travis' Sunglasses 3'']] |
||
| ⚫ | |||
|T3 |
|T3 |
||
|<font color="gold">★★★★</font> |
|<font color="gold">★★★★</font> |
||
| − | | |
+ | |5 |
|} |
|} |
||
== Tips == |
== Tips == |
||
* Farming Reversal Tubers is an outrageous waste of time. Buy Reversal metals from [[Gyaku-Funsha|Gyakufunsha]], or passively farm them from Hater chests that drop in [[Tengoku]]. |
* Farming Reversal Tubers is an outrageous waste of time. Buy Reversal metals from [[Gyaku-Funsha|Gyakufunsha]], or passively farm them from Hater chests that drop in [[Tengoku]]. |
||
| + | * There’s a Reversal tuber that always spawn in floor 19th Daida. Like some other tubers farming tips, just go back and forth to that floor. |
||
[[Category:Materials]] |
[[Category:Materials]] |
||
Latest revision as of 01:27, 21 January 2024
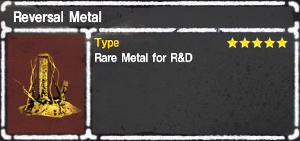
![]() Reversal Metal is a very rare Tuber Metal used for developing Weapons and Armor at Chokufunsha.
Reversal Metal is a very rare Tuber Metal used for developing Weapons and Armor at Chokufunsha.
Locations[ | ]
Reversal Metal can be found on any floor as it is a rare drop from the Reversal Tuber type enemies.
You can also buy Reversal Metal from Gyaku-Funsha where it costs 50,000 KC.
Additionally you can get Reversal Metal from certain types of Quests.
On 34F Kohashi, there are 3 Reversal Tubers, that can drop Reversal Metal.
Alternatively, Tengoku is also a good way to obtain Reversal Metal as red named Haters above 51F drop Tuber Metals via Silver Treasure Chest drops.
Uses[ | ]
For all non-Event gear, it currently takes 635 Reversal Metal to complete its uses. Event gear uses an additional 5, for a complete total of 640.
NOTE: Tier is a level of power typically based on the number of times equipment has changed forms, not the number of stars it has.
| Type | F | Name | Tier | Stars | # |
|---|---|---|---|---|---|
| DOD | Travis' Sunglasses 3 | T3 | ★★★★ | 5 |
Tips[ | ]
- Farming Reversal Tubers is an outrageous waste of time. Buy Reversal metals from Gyakufunsha, or passively farm them from Hater chests that drop in Tengoku.
- There’s a Reversal tuber that always spawn in floor 19th Daida. Like some other tubers farming tips, just go back and forth to that floor.

